How To Achieve Perfect Surface Finish On ABS Parts?
Struggling with rough, uneven surfaces on your ABS plastic parts? These imperfections can ruin your product's aesthetics and function. Let me show you how to get that perfect, professional finish every time.
Achieving a perfect ABS surface finish involves selecting the right manufacturing process, like precision CNC machining or high-quality injection molding, and applying specific post-processing techniques. Key factors include tool selection, machine settings, and manual finishing methods like sanding, vapor smoothing, and polishing for a flawless result.
I've worked with many clients, like Mark from Canada, who need their parts to look absolutely flawless for their customers. He once told me, "Sandra, a bad finish means a lost sale." He's right. Getting the surface finish right is not just about looks; it's about quality and reputation. Over the years, we've perfected our techniques to ensure every ABS part that leaves our facility meets the highest standards. In this article, I will share the exact methods we use, so you can achieve the same professional results for your projects.
What is the surface finish of ABS?
Are you unsure what a "good finish" for ABS even looks like? This uncertainty can lead to misunderstandings with your manufacturer and costly mistakes. I will clarify what to expect.
The natural, as-manufactured surface finish of ABS plastic varies by process. For CNC machining, it's typically around 125 Ra μin. For 3D printing, you'll see layer lines. Injection molding can achieve very smooth, glossy finishes depending on the mold's quality.

The term "surface finish" refers to the texture of a part's surface. We measure this texture using a value called Ra, which stands for Roughness Average. A lower Ra value means a smoother surface. The manufacturing method you choose has the biggest impact on the initial surface finish of your ABS part.
Comparing Manufacturing Methods
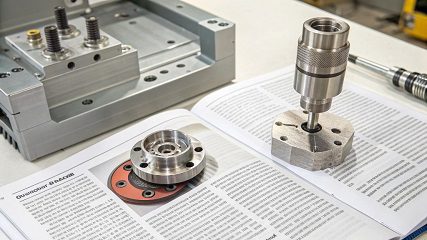
Let's look at how different processes affect the final texture. Each one produces a unique starting point that determines how much post-processing work you might need. Here at Worthy Hardware, we specialize in CNC machining, but it's important to understand all the options.
| Manufacturing Method | Typical Ra Value (μin) | Description |
|---|---|---|
| CNC Machining | 63 - 125 Ra | Visible but fine tool marks. Our standard finish. |
| Injection Molding | 2 - 32 Ra | Can be mirror-smooth depending on the mold finish. |
| 3D Printing (FDM) | 400 - 1000 Ra | Visible layer lines, requires significant smoothing. |
As you can see, injection molding offers the smoothest "out-of-the-box" finish, but the high cost of molds makes it suitable only for high-volume production. For prototypes and low-to-mid volume runs, CNC machining provides an excellent balance of quality and cost.
How to finish ABS plastic?
Do you have a raw ABS part that looks rough and unfinished? Leaving it as-is can make your final product look cheap. Let me show you how to transform it.
To finish ABS plastic, start with progressive sanding from coarse to very fine grit sandpaper. For a glossy look, use acetone vapor smoothing or apply polishing compounds with a buffing wheel. Painting is also a great option for color and a protective layer.

Finishing an ABS part is where the real magic happens. You take a good part and make it great. A client in the consumer electronics space once brought me a CNC-machined prototype for a remote control. The dimensions were perfect, but it felt rough. We took it through our finishing process, and the final result looked and felt just like a mass-produced product. This attention to detail helped him secure funding.
Step-by-Step Finishing Guide
Let's break down the process into clear, manageable steps. You can stop at any step, depending on the finish you need.
1. Sanding
Sanding is the foundation of a great finish. It removes the visible marks left by the manufacturing process.
- Start Coarse: Begin with a lower grit sandpaper, like 220-grit, to remove major imperfections and tool marks.
- Go Finer: Gradually move up to higher grits (400, 600, 1200, and finally 2000). This process, known as wet sanding with the finer grits, creates an ultra-smooth surface ready for polishing or painting.
2. Polishing
Polishing is what gives the part its shine. After sanding, the part will be smooth but matte.
- Apply Compound: Use a plastic polishing compound and a soft microfiber cloth or a buffing wheel.
- Buff to a Shine: Work the compound into the surface in a circular motion until you achieve the desired level of gloss. This can range from a semi-gloss sheen to a mirror-like finish.
How to get a better surface finish in machining?
Are your CNC-machined ABS parts coming out with visible tool marks and a rough texture? This can compromise your design's quality. There are specific machine settings you must use.
To get a better surface finish when machining ABS, reduce the feed rate and use a sharp, multi-flute cutting tool. Increasing the spindle speed and using a shallow depth of cut also minimizes tool marks and heat buildup, resulting in a much smoother surface.

This is an area where we have a lot of experience at Worthy Hardware. Many customers come to us after getting poor results elsewhere. The problem is often that their previous supplier treated ABS like a metal. Plastic is different. It melts easily and can deform under pressure if you're not careful. We've developed specific parameters just for machining plastics like ABS.
Key Machining Parameters for ABS
Adjusting your CNC machine's settings is crucial. It’s a balance between speed and quality. For a superior finish, quality must come first.
Cutter Selection
The tool you use makes a huge difference.
- Tool Type: Use sharp, uncoated carbide end mills. Tools designed specifically for plastics often have a higher helix angle to evacuate chips effectively.
- Flute Count: More flutes (e.g., a 3 or 4-flute tool) can create a smoother finish, as each cutting edge removes a smaller amount of material.
Machine Settings
Here are the settings we adjust to prioritize surface finish.
| Parameter | Recommended Action | Why it Works |
|---|---|---|
| Feed Rate | Decrease | Reduces the load on the cutting tool, minimizing vibration and tool marks. A slower pass leaves a cleaner cut. |
| Spindle Speed | Increase | A faster rotating tool cuts more cleanly. However, be careful not to create too much friction and melt the ABS. |
| Depth of Cut | Decrease | A shallow finishing pass removes a very small amount of material, basically "skimming" the surface to make it smooth. |
By fine-tuning these variables, we can machine ABS parts that require very little post-processing, saving time and money while delivering a beautiful finish right off the machine.
How to finish ABS prints?
Are your 3D prints covered in ugly layer lines? These lines are a dead giveaway that the part was printed, making it look like a cheap prototype. I'll show you how to fix this.
To finish ABS 3D prints, start by sanding to remove layer lines. For the smoothest, most professional finish, use acetone vapor smoothing. This process melts the outer layer of the plastic, creating a uniform, glossy surface that looks like it was injection molded.

Finishing 3D prints is a completely different challenge compared to finishing machined parts. With 3D printing, the main goal is to hide the fact that it was built layer by layer. The most effective method for this is vapor smoothing. One of my clients, a startup founder, uses this technique on his ABS prototypes before showing them to investors. He says the glossy, professional finish makes his product look market-ready, not like something made on a desktop printer.
The Vapor Smoothing Process
Acetone vapor smoothing sounds complex, but the idea is simple. Acetone solvent dissolves ABS plastic. By exposing a printed part to acetone vapor in a controlled way, you can melt just the very outer surface.
Safety First
Warning: Acetone is highly flammable and its fumes are harmful to inhale. This process must be done in a well-ventilated area, away from any open flames, and with proper safety gear like gloves and a respirator.
Steps for Smoothing:
- Prepare the Part: First, sand the print to remove any blobs, strings, or major imperfections. The smoother it is before you start, the better the final result will be.
- Set Up the Chamber: You need a sealed container, like a glass jar or a metal can. Place paper towels soaked in acetone along the inside walls of the container, making sure they don't touch the part.
- Place the Part Inside: Put your ABS print on a small, non-ABS platform (like a piece of aluminum foil) inside the chamber. This prevents it from sticking to the bottom.
- Seal and Wait: Seal the container and watch closely. The process can take anywhere from 10 minutes to a few hours, depending on the size of the part and the concentration of the vapor. The layer lines will slowly disappear, and the surface will become glossy.
- Remove and Cure: Once you achieve the desired smoothness, carefully remove the part and let it air out in a well-ventilated area until it is fully hardened. The surface will be soft at first.
Conclusion
In summary, achieving a perfect finish on ABS parts is entirely possible. It requires choosing the right process, carefully controlling your parameters, and applying the correct finishing techniques.