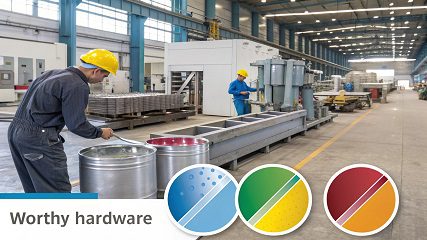
How To Achieve Consistent Color Matching In Anodized Aluminum Parts?
Frustrated with color variations in your anodized parts? These inconsistencies can ruin a product's look and cause costly rejections. It's a common, but solvable, manufacturing headache for many businesses.
To get consistent color in anodized aluminum, you must control key factors. Use the same batch of raw material for all parts. Also, keep the anodizing bath temperature, dye concentration, and immersion time exactly the same for every single piece in the production run.
Getting that perfect, uniform color is a big challenge for many of my customers. They often ask me how we at Worthy Hardware manage it. It's not just one thing, but a series of careful steps we take. I find that the result you get is directly related to the control you have over the entire process. Let's break down the common questions I hear. This will help you understand the process better and see why details matter so much.
Can you color match anodized aluminum?
Worried you can't get new parts to match an old anodized sample? This mismatch can disrupt your product line. You need a reliable way to achieve a perfect color match every time.
Yes, you can color match anodized aluminum, but it requires precision. The best way is to use a physical sample from the original batch as a control standard. By carefully adjusting the dye concentration and anodizing time, a skilled supplier can achieve a very close match to your target color.
Color matching is one of the most frequent requests I get, especially from clients who need to produce new batches of an existing product. I once worked with Mark, a company owner from Canada, who needed a new run of CNC machined parts. These parts had to perfectly match a product he had launched a year earlier. The specific blue color was a key part of his brand identity. He sent us a physical sample, which is always the best approach. A digital color code like a PANTONE number is a good start, but it doesn't account for the material's finish and how it reflects light.
The real problem with color consistency often begins with the raw material itself. Different aluminum alloys, and even different production lots of the same alloy, can anodize differently. For Mark's project, we made sure to source the exact same 6061-T6 aluminum from the same supplier as his original order. This is our first step in controlling consistency. From there, it's all about process control. We run small test pieces, called coupons, and carefully adjust the anodizing parameters to match the sample he sent. This is how we guarantee a perfect match.
Which type of filler material should be used to obtain the best color match after anodizing?
Have you ever welded an aluminum part, only to find the weld line is a different color after anodizing? This ugly seam can ruin your product's finish. You need the right solution.
For the best color match after anodizing, use a filler rod with a chemical composition as close as possible to the base aluminum parts. For example, when welding 6061 aluminum, a 5356 filler rod is a good choice because it anodizes to a very similar color.

This is a technical detail that can make or break the final look of a product. Anodizing is an electrochemical process, and the final color depends entirely on how the metal alloy reacts. If you weld a part with a filler material that has a different chemical makeup, it will react differently in the anodizing bath, and you will see a different color.
I remember a project for an industrial client in Europe. They designed large equipment frames from welded 6061 aluminum. The first prototypes they got from another supplier looked terrible after anodizing because the weld lines were a dark, ugly gray. The issue was the filler rod. Their previous supplier used a 4043 filler rod. This type is high in silicon. Silicon turns very dark when anodized. We recommended they switch to a 5356 filler rod. This type has a high magnesium content, which anodizes to a clear or light gray finish, almost identical to the 6061 parent material. The change made the weld lines nearly invisible after we anodized the parts. Choosing the right filler is critical for a high-quality aesthetic finish.
| Filler Rod Type | Main Alloying Element | Post-Anodizing Color | Best Use Case |
|---|---|---|---|
| 4043 | Silicon (Si) | Dark Gray / Black | For parts that will not be anodized |
| 5356 | Magnesium (Mg) | Clear / Light Gray | For parts that will be color anodized |
How do you keep anodized aluminum from fading?
Is your product's beautiful anodized color fading over time, especially outdoors? This makes your product look old and cheap. You need a finish that lasts and protects your brand's reputation.
To prevent fading, the key is a proper sealing process after anodizing and dyeing. A high-quality seal closes the porous aluminum oxide layer, locking the dye particles in. For outdoor use, choosing UV-stable dyes is also essential to ensure long-term color durability against sunlight.

Color fading is a major concern, particularly for products used outdoors. The anodizing process creates a surface with millions of tiny pores, and these pores absorb the dye. The final step, sealing, is what locks that color in. If this step is done poorly, the color can fade or "bleed" out over time. I worked with a customer from Australia who was developing architectural lighting fixtures. They were very worried about color fading because of the intense sunlight and UV exposure there. We focused on two critical areas for them.
First, we sourced special dyes designed for architectural applications. These dyes have superior UV stabilitycompared to standard dyes. They cost more, but they are necessary for products that need to last. Second, we perfected our sealing process. We use a hot deionized water sealing bath. The temperature and the time the part spends in the bath are extremely important. If the temperature is too low or the time is too short, the pores won't close completely. We regularly check our bath chemistry and run tests to make sure our seal is perfect. This careful attention to detail ensures the anodized finish maintains its vibrant color for years.
How does anodized aluminum get its color?
Ever wonder how aluminum gets those vibrant, durable colors? It’s not just paint. Understanding the process can help you make better design choices for your own custom parts and materials.
Anodized aluminum gets its color in a multi-step process. First, an electrochemical process creates a porous oxide layer on the surface. Then, the part is dipped into a tank of organic dye, which seeps into these open pores. Finally, the part is sealed, trapping the color inside.

I often explain the process to my customers using a simple analogy. Think of the surface of the aluminum part after the first step of anodizing like a honeycomb. The process creates a very hard, clear layer of aluminum oxide that is filled with tiny, deep holes or pores. This oxide layer is what makes the surface so durable. Next comes the coloring. We submerge the part into a tank filled with a liquid dye solution. The dye flows into all of those millions of tiny pores, filling them with color. The amount of time the part stays in the dye bath, along with the dye concentration and temperature, determines the final color.
A few seconds can be the difference between light pink and deep red. This is why process control is so vital for color consistency. The final and most important step is sealing. We immerse the part in a sealing bath, usually hot deionized water. This causes the aluminum oxide to hydrate and swell, which closes the tops of the pores. The color is now permanently locked inside the hard, protective surface. It’s not a coating on top like paint; it is now an integral part of the aluminum surface itself.
Conclusion
Achieving consistent anodized color depends on controlling materials and processes. By managing raw aluminum, dye baths, and sealing, you can ensure your parts look perfect every time. We can help.