
What Is Metal Stamping and What Processes Are Involved
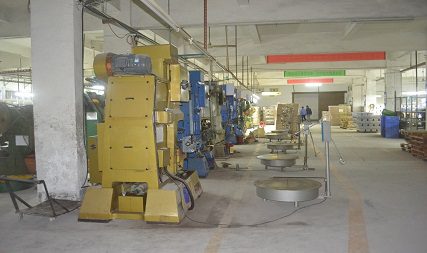
By Sandra Gao, Founder of Worthy Hardware
Struggling to find the right manufacturing method for your custom metal parts? Choosing the wrong process can mean blown budgets, missed deadlines, and frustrated customers. Metal stamping offers a precise, efficient, and scalable solution — especially for high-volume production.
Metal stamping is a manufacturing process that uses a custom die and a stamping press to cut, bend, and form flat sheet metal into specific shapes. It's one of the most cost-effective methods for producing thousands — or millions — of identical parts with tolerances as tight as 0.001" (0.025mm).
I'm Sandra Gao, founder of Worthy Hardware, a precision metal stamping manufacturer based in China. Over the past decade, we've served customers across North America, Europe, Japan, Singapore, and Australia — stamping everything from aerospace brackets to tiny electronic connectors in 100+ material grades.
When I talk to buyers like Mark, a procurement officer and company owner in Canada, the story is often the same: he has a solid design, but his previous supplier delivered late and the quality wasn't right. After waiting 6–8 weeks, he opened the shipment to find parts that didn't meet spec. That's not just a manufacturing problem — it's a business problem.
Whether you're an engineer refining a design, a startup validating a prototype, or a procurement professional sourcing at volume — this article is written for you.
What Is Metal Stamping?
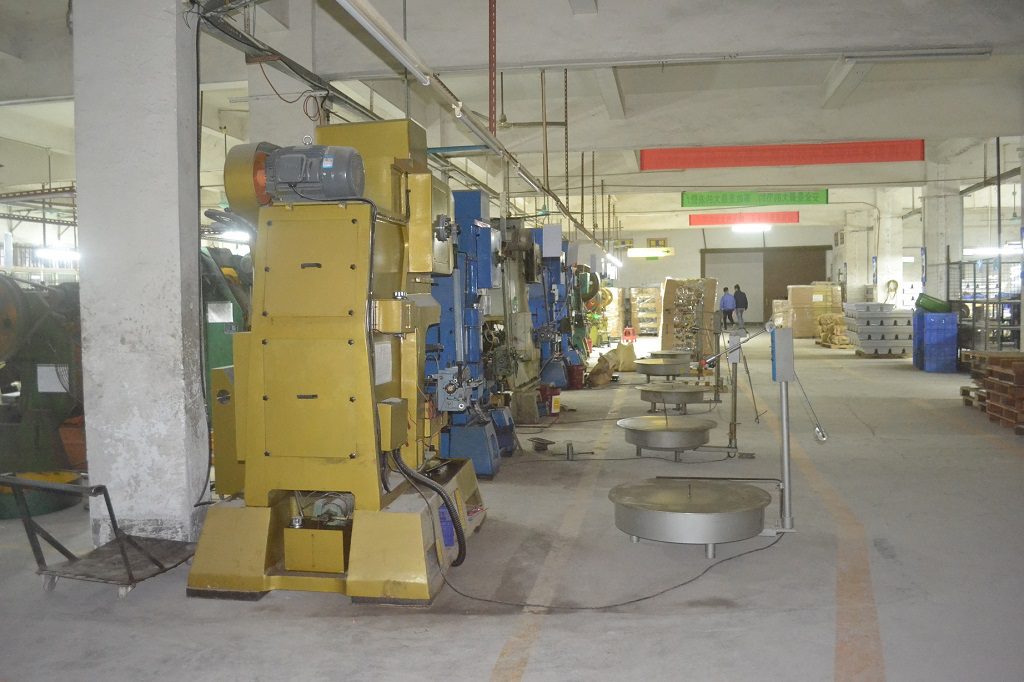
Need a high volume of identical metal parts produced quickly and consistently? Manual fabrication is too slow, too expensive, and introduces too much variation. Metal stamping solves this by combining speed, precision, and repeatability into a single automated process.
Metal stamping is a manufacturing process that uses a press and a custom-engineered die to cut, bend, punch, and form flat sheet metal into a finished shape. After the initial tooling investment, each part can be produced in seconds with virtually no variation between pieces — whether you're making 1,000 or 1,000,000.
I see this play out constantly in my work at Worthy Hardware. A customer comes to us needing a specific metal component — say, an EMI shielding cover for a telecommunications device. They've been making it with CNC machining at 3.50perpiece.Afterwedesignaprogressivestampingdie,theirper−partcostdropsto3.50 per piece. After we design a progressive stamping die, their per-part cost drops to 3.50perpiece.Afterwedesignaprogressivestampingdie,theirper−partcostdropsto0.15 at volume. The part is identical every time, and we're producing hundreds per minute instead of one every few minutes.
That's the fundamental value of metal stamping: high precision at high speed, with dramatically lower costs at scale.
Key Aspects of Metal Stamping
Think about the small metal parts inside your car, your phone, or a medical device. The clips holding wiring harnesses in place, the shielding covers protecting circuit boards, the terminals connecting electrical systems — most of these are metal stamped parts.
At Worthy, we specialize in precision metal stamping with tolerances as tight as 0.001 inches (0.025mm). Our press capacity ranges from 5 to 500 tons, allowing us to stamp everything from delicate copper contacts for semiconductors to heavy-duty steel brackets for industrial equipment. Our team of 4 experienced engineers reviews every design to ensure it's optimized for the stamping process before any tooling is cut.
The stamping process is defined by four core actions, which are often combined within a single die:
| Action | Description | Common Use |
| Bending | Forming the metal along a straight axis to create an angle. | L-brackets, V-shapes, flanged edges, clips. |
| Cutting | Shearing the metal to separate the part from the sheet. | Blanking a part's outer profile before forming. |
| Punching | Removing material to create holes or internal features. | Screw holes, ventilation slots, alignment pins. |
| Forming | Shaping the metal into complex three-dimensional geometries. | Cups, shields, deep-drawn enclosures. |
Why Combining Operations in a Single Die Matters
Here's what makes stamping so efficient from an engineering standpoint: we can combine multiple operations — cutting, punching, bending, and forming — into a single progressive die. The metal strip feeds through the die, and at each station, a different operation is performed. By the time the strip exits the final station, the part is complete.
This matters to you for three reasons:
- Lower cost per part. No separate machine setups for each operation means less labor and less machine time.
- Better accuracy. The part never leaves the die between operations, so there's no repositioning error. Each feature is located precisely relative to the others.
- Faster delivery. Fewer process steps mean shorter production cycles. When your timeline is tight, this can be the difference between hitting your launch date and missing it.
The initial investment is in the tooling — designing and manufacturing the die. But for production volumes above a few hundred parts, that cost is spread so thin that the per-part price becomes a fraction of what CNC machining or manual fabrication would cost.
To ensure the precision we promise is actually delivered, every part we produce goes through 100% inspection, backed by electronic tool and press monitoring that detects anomalies in real time during production. When we say ±0.025mm, we stand behind it with data — not just a claim on a website.
How Does the Metal Stamping Process Work?
Curious about how a flat sheet of metal transforms into a precision component? The process involves several carefully coordinated steps, but the core principle is straightforward. I'll break it down so you understand exactly what happens inside the press — and why each step matters to your part's quality.
The metal stamping process starts by feeding a coil of sheet metal into a stamping press. A custom-engineered die then cuts, bends, and forms the metal into the finished shape. The completed part is ejected, and the cycle repeats automatically — often hundreds of times per minute.
The Relationship Between the Press and the Die
To understand metal stamping, you need to understand the two core components that work together:
- The press provides the force. Think of it as the muscle.
- The die provides the shape and precision. Think of it as the brain.
I always tell my engineering team: the quality of our parts is a direct reflection of the quality of our dies. You can have the most expensive press in the world, but if the die is poorly designed or manufactured, every part that comes off that press will be out of spec.
This is why we keep our tool and die making in-house at Worthy. We don't outsource this critical step. Our engineers design the die, our toolroom manufactures it using precision CNC and wire EDM equipment, and our team trials it on the press until every dimension is verified. We use high-grade tool steels (such as SKD11 and DC53) for critical die components because they hold their edge over millions of press cycles. A typical progressive die in our shop is designed for a lifespan of 1 million+ strokes before major maintenance is needed.
I've seen firsthand what happens when this step is rushed. A customer came to us after their previous supplier delivered a die that produced parts with a 0.15mm dimensional shift after just 50,000 cycles. The die steel was too soft, and the cutting edges wore prematurely. We redesigned the die with proper material selection and heat treatment, and the replacement tool has been running for over 800,000 cycles with no dimensional drift. That's the difference proper tooling makes.
The Stamping Workflow: Step by Step
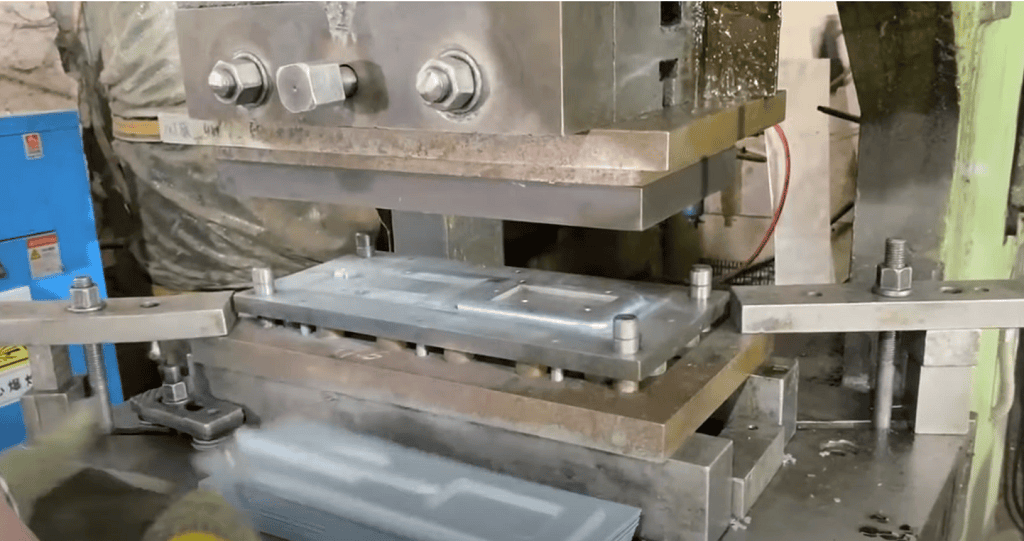
The basic workflow is straightforward, but the precision behind each step is what separates high-quality stamping from mediocre work:
Step 1: Coil Feeding
A large coil of sheet metal (steel, aluminum, copper, brass, or other material) is loaded onto a decoiler and fed into the press through a straightener and feeder system. The feeder advances the strip a precise distance with each press stroke — typically accurate to within ±0.05mm. This feed accuracy directly affects the positional accuracy of every feature on your part.
Step 2: Die Operation
As the metal strip advances into the die, the press closes with force ranging from 5 to 500 tons (depending on the part size and material thickness). The die performs its programmed operations — cutting, punching, bending, forming — in a fraction of a second. In a progressive die, the strip moves through multiple stations, with each station performing a different operation. By the final station, the part is complete.
Step 3: Part Ejection and Collection
The finished part is separated from the strip (or ejected from the die cavity) and collected — either into bins or onto a conveyor for further processing. The remaining metal strip (called the skeleton) is collected and sent for recycling. At Worthy, we track material utilization rates and work with our engineers during die design to maximize material efficiency, which helps keep your costs down.
Step 4: In-Process Monitoring
This step happens continuously during Steps 2 and 3. Our electronic tool and press monitoring system measures the force profile of every single press stroke in real time. If the force signature deviates from the established baseline — which could indicate a broken punch, a material defect, or a misaligned strip — the system automatically stops the press before defective parts are produced.
This real-time monitoring is one of the most important quality safeguards we have. It means we catch problems at the moment they occur, not after a batch of 10,000 bad parts has already been stamped.
Types of Stamping Presses
We use different press types depending on the part requirements:
| Press Type | Best For | Why We Use It | Worthy's Capacity |
| Mechanical Press | High-speed production, thin materials, progressive dies. | Extremely fast cycle times (up to 1,500+ strokes per minute for small parts). Ideal for high-volume terminals, clips, and contacts. | 5 to 300 tons |
| Hydraulic Press | Deep drawing, thick materials, complex forming. | Provides full force throughout the entire stroke. Essential for forming deep shapes without tearing or thinning the material. | Up to 500 tons |
The choice between mechanical and hydraulic depends on your part's geometry and material. For most progressive stamping work — clips, brackets, terminals, connectors — mechanical presses give us the speed we need. For deep-drawn parts like cups, housings, or enclosures, hydraulic presses give us the controlled force needed to form the metal without failure.
Why Die Quality Is the Single Biggest Factor in Part Quality
I want to emphasize this point because it's something many buyers overlook when choosing a supplier. They focus on price per part and delivery time (which are important), but they don't ask about the die.
Here's the reality: a precision die produces precision parts. A mediocre die produces mediocre parts. And once a bad die is made, no amount of operator skill or press adjustment can fix the fundamental problem.
At Worthy, our die-making process includes:
- Design review by senior engineers before any steel is cut
- 3D simulation of material flow for complex forming operations
- Precision manufacturing using CNC milling, wire EDM, and surface grinding
- Heat treatment of critical components for hardness and wear resistance
- Trial runs and dimensional verification before production begins
- Electronic monitoring during production to track die condition over time
This investment in tooling is what allows us to deliver parts at ±0.025mm consistently — not just on the first part, but on the millionth part.
What Are the Core Operations Involved in Metal Stamping?
Want to know exactly what happens inside the die when your part is being made? Each operation serves a specific engineering purpose, and understanding them helps you communicate more effectively with your supplier — and even optimize your design to save cost.
The core operations in metal stamping include blanking, piercing, bending, forming, coining, and in-die tapping. Each operation transforms flat sheet metal in a different way, and they are frequently combined within a single progressive die to produce complex finished parts in one continuous press cycle.
When I review a customer's design at Worthy, I'm always thinking about which combination of operations will produce the best result at the lowest cost. Every feature on your part — a hole, a bend, a tab, a threaded boss — requires a specific operation. Sometimes, by slightly modifying a design feature, we can eliminate an entire operation from the die, which reduces tooling cost and improves cycle time.
Let me walk through each operation in detail, including the engineering considerations that matter for your project.
Blanking
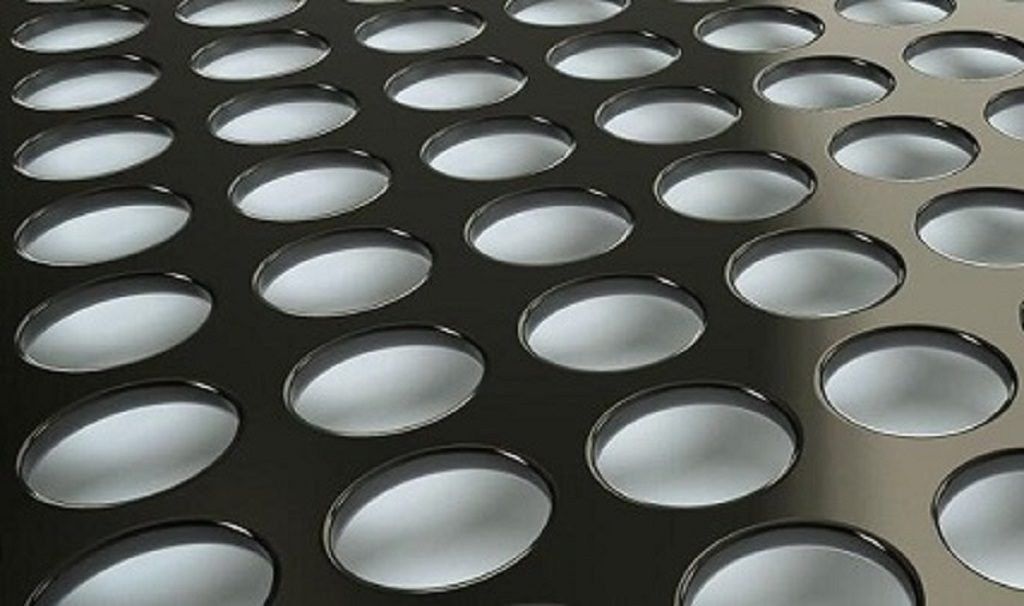
Blanking is typically the first operation in any stamping sequence. The die cuts a flat shape — called a blank — out of the metal strip. Think of it as a precision cookie cutter: the cut-out piece becomes your part (or the starting workpiece for further operations like bending or forming).
Engineering considerations:
- The blank shape determines how much material is used per part. Our engineers optimize blank layout (called nesting) to maximize material utilization and minimize waste.
- Edge quality depends on the clearance between punch and die. Too much clearance creates burrs; too little causes excessive tool wear. At Worthy, we typically hold punch-to-die clearance at 5-10% of material thickness per side, adjusted based on the specific material grade.
What we stamp with blanking: Flat springs, mounting plates, retainers, washers, and the starting blanks for any formed or drawn component.
Piercing
Piercing is the inverse of blanking. Instead of the cut-out piece being the part, the surrounding material is the part, and the cut-out material (called the slug) is scrap. Piercing creates holes, slots, and internal cutouts.
Engineering considerations:
- There's a minimum hole size rule: the smallest hole you can reliably pierce is approximately equal to the material thickness. For example, in 1.0mm thick steel, the smallest round hole is approximately 1.0mm diameter. Going smaller requires special tooling and slower speeds.
- Hole-to-edge distance matters. If a hole is too close to the part edge or to a bend line, the material can deform or crack. Our general rule is minimum 1.5× material thickness from any edge or feature.
- For elongated slots or non-round holes, we consider the aspect ratio to prevent punch breakage.
What we stamp with piercing: Screw holes in brackets, ventilation slots in shields, wire routing holes in terminals, alignment features in retainers, and weight-reduction cutouts in mounting plates.
Bending
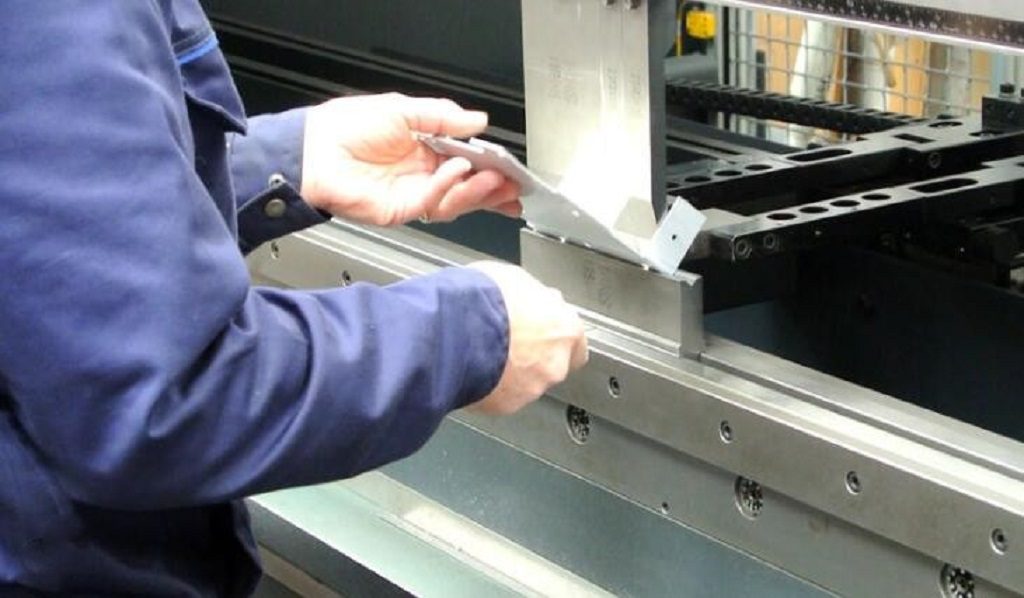
Bending forms the metal along a straight axis to create an angle. This is how we produce L-brackets, U-channels, Z-shapes, flanged edges, and clips. It's one of the most common operations in stamping, and also one that requires the most engineering attention.
The springback challenge:
Every metal has elastic memory. When you bend it to 90°, it springs back slightly — maybe to 87° or 88°, depending on the material, thickness, and bend radius. If you don't compensate for this, your final angle will be wrong.
Our engineers calculate the springback for each material and design the die to over-bend by the appropriate amount. For example, if we need a final angle of 90° in 301 stainless steel (which has high springback), we might design the die to bend to 85° or 86°, knowing the material will spring back to exactly 90°. This calculation is based on material tensile strength, bend radius, and grain direction.
Minimum bend radius:
There's a physical limit to how tight you can bend a material before it cracks on the outer surface. The general rule is:
- Soft materials (annealed copper, aluminum): minimum inside radius ≈ 0.5× material thickness
- Medium materials (mild steel, brass): minimum inside radius ≈ 1× material thickness
- Hard materials (stainless steel, spring steel): minimum inside radius ≈ 2× material thickness
If your design specifies a bend radius tighter than the material allows, we'll flag it during our design review and suggest alternatives — either a larger radius or a different material temper.
Real example from our shop: A customer in the automotive sector designed a steel mounting bracket with four 90° bends. Their original design specified the bends very close together, which would have caused material interference during the forming sequence. Our engineer restructured the bend sequence in the die — changing the order in which bends were made — so all four bends could be completed without collision. This eliminated the need for a secondary bending operation outside the die, saving the customer approximately 25% on per-part cost.
What we stamp with bending: L-brackets, U-channels, clips, spring contacts, flanged mounting plates, cable clamps, and any part with angular features.
Forming
Forming changes the shape of metal into three-dimensional geometries without cutting it. This is a broad category that includes several sub-operations:
- Drawing: Pulling a flat blank into a die cavity to create a cup, box, or shell shape. The metal stretches and flows into the cavity.
- Deep drawing: Same as drawing, but the depth of the part exceeds its diameter. This requires careful control of blank holder force to prevent wrinkling or tearing.
- Embossing: Creating raised or recessed features (like logos, stiffening ribs, or locating dimples) by pressing the metal between shaped die surfaces.
- Stretching: Expanding the metal over a shape, thinning it in the process.
Engineering considerations:
- Draw ratio is the key factor in drawing operations. Draw ratio = blank diameter ÷ punch diameter. For most materials, the maximum draw ratio in a single operation is approximately 2.0. If your part requires a deeper draw, we use multiple drawing stages (redrawing) to achieve the final depth without tearing.
- Material selection matters enormously in forming. Ductile materials like copper, aluminum, and low-carbon steel form easily. Hard or brittle materials may crack during deep draws.
- At Worthy, we use our hydraulic presses (up to 500 tons) for deep drawing operations because they provide consistent force throughout the entire stroke — essential for controlling material flow without tearing.
What we stamp with forming: Cups, shields, EMI enclosures, battery housings, sensor covers, and any component with depth or complex curvature.
Coining
Coining applies extremely high pressure to a localized area of the metal, compressing it between flat or shaped die surfaces. This creates fine details, sharp corners, controlled thickness, and ultra-tight tolerances on specific features.
The name comes from the process used to mint coins — the same principle of compressing metal under massive force to reproduce fine detail.
Engineering considerations:
- Coining requires significantly more tonnage than standard blanking or bending — often 3-5× more force per unit area. This is why press capacity matters. Our 500-ton presses give us the force needed for coining operations on larger features.
- We use coining when a customer's design requires flatness tolerances tighter than standard stamping can achieve, or when a specific surface needs to be perfectly smooth for sealing or electrical contact.
- At Worthy, we've coined features on aerospace components to tolerances of ±0.01mm — well beyond what standard stamping operations typically achieve.
What we stamp with coining: Electrical contact surfaces, precision bearing surfaces, sealing faces, thickness-controlled areas, and any feature requiring tolerances tighter than ±0.025mm.
In-Die Tapping
This is one of our key differentiating capabilities at Worthy, and it's worth explaining in detail because not all stamping suppliers offer it.
In-die tapping means we cut internal threads directly inside the stamping die during the normal press cycle. The tapping unit is synchronized with the press stroke, so threads are formed at the same time as all other stamping operations. The part comes out of the die fully threaded — ready for assembly with no secondary processing.
Why this matters to you:
Without in-die tapping, here's what the process looks like:
- Stamp the part (including piercing the pilot hole for the thread)
- Collect stamped parts in bins
- Transport bins to a separate tapping machine
- Load parts into tapping fixture
- Tap threads one at a time
- Inspect threaded parts
- Repackage for shipping or assembly
That's 7 steps. With in-die tapping, it's essentially 1 step. The part exits the die with threads already cut.
The practical impact:
- Eliminates 1 secondary operation completely
- Reduces handling — fewer touches means lower risk of scratches, dents, or dimensional distortion
- Shortens delivery time by 2-5 days depending on batch size
- Lowers per-part cost by 15-30% compared to stamping + separate tapping
- Improves thread-to-feature positional accuracy because the thread is cut while the part is still fixtured in the die
I've seen customers come to us from other suppliers who were charging separately for stamping and tapping, with the tapping operation sometimes taking longer than the stamping itself. When we consolidated everything into in-die tapping, their total cost dropped by over 20% and their lead time shortened by nearly a week.
What we stamp with in-die tapping: Threaded brackets, mounting hardware, panel fasteners, and any stamped part that needs internal threads for bolt or screw assembly.
Operations Summary
| Operation | What It Does | Key Engineering Factor | Common Application |
| Blanking | Cuts outer shape from sheet metal. | Punch-to-die clearance controls edge quality. | Flat springs, mounting plates, retainers. |
| Piercing | Creates holes and internal cutouts. | Min hole diameter ≈ material thickness. | Screw holes, ventilation slots, alignment features. |
| Bending | Forms angles along a straight axis. | Springback compensation and minimum bend radius. | L-brackets, clips, flanges, U-channels. |
| Forming | Shapes metal into 3D forms without cutting. | Draw ratio and blank holder force control. | Cups, shields, deep-drawn enclosures. |
| Coining | Compresses metal for fine detail and ultra-tight tolerance. | Requires 3-5× more tonnage than standard operations. | Electrical contacts, precision sealing surfaces. |
| In-Die Tapping | Cuts threads during the stamping cycle. | Eliminates secondary operations, saves 15-30% cost. | Threaded brackets, mounting hardware. |
What Types of Metal Stamping Processes Does Worthy Offer?
Not sure which stamping method is right for your project? The choice of process directly affects your tooling cost, per-part price, achievable geometry, and delivery timeline. I'll cover the four main stamping processes we offer at Worthy and explain exactly when each one is the best fit.
We offer progressive stamping, fourslide stamping, deep draw stamping, and transfer stamping. The right choice depends on your part's geometry, size, material, production volume, and cost targets. Choosing the wrong process doesn't just cost more — it can make certain part features impossible to achieve, or create quality problems that show up only after production begins.
Helping customers select the right process is one of the first things our engineering team does when we receive a new inquiry. In many cases, the customer already has a preference, but after reviewing their part geometry and volume requirements, we may suggest a different approach that saves significant cost. Let me walk you through each option.
Progressive Stamping
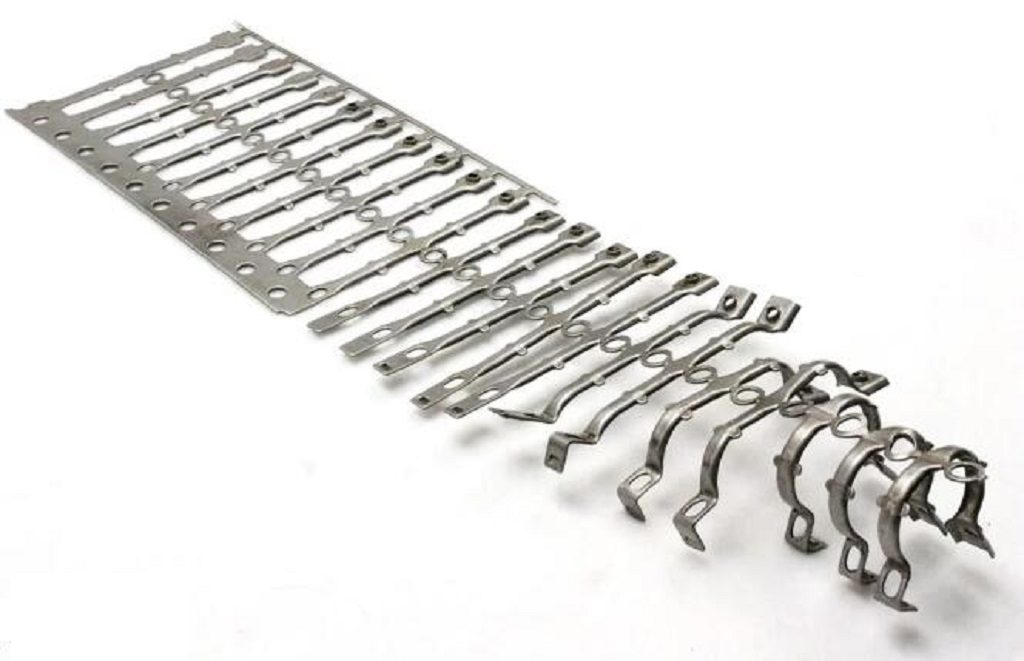
Progressive stamping is the most common and most efficient method for high-volume production of small to medium-sized parts. A continuous strip of metal feeds through a die that contains multiple stations arranged in sequence. At each station, a different operation is performed — punching at station 1, notching at station 2, bending at station 3, cutoff at station 4, and so on. By the time the strip exits the final station, the part is fully formed and separated.
Technical details:
- Typical progressive dies at Worthy have 8 to 25 stations, depending on part complexity
- Press speeds range from 100 to 800 strokes per minute for small parts (terminals, contacts)
- Parts remain attached to the carrier strip throughout the entire forming sequence, which maintains positional accuracy between features
- Material thickness range: 0.1mm to 6.0mm
- Maximum strip width we process: 300mm
When we recommend progressive stamping:
- Production volumes above 10,000 parts (sweet spot is 50,000+)
- Parts with multiple features (holes, bends, tabs, lances) that can be formed in sequence
- Parts small enough to be carried on a metal strip
- When lowest per-part cost is the primary goal
Real example: A connector manufacturer in Singapore needed 500,000 copper terminals per month. Each terminal required 4 piercing operations, 2 bends, and a final cutoff. We designed a 12-station progressive die running at 400 strokes per minute. The per-part cost came to less than $0.02, and the entire monthly order is completed in under 3 days of press time. That's the power of progressive stamping at volume.
Typical tooling investment: 8,000–8,000 – 8,000–50,000 depending on number of stations and complexity. For the connector example above, the die cost was approximately $18,000 — paid back within the first two months of production through per-part savings compared to their previous supplier's CNC approach.
Fourslide Stamping
Fourslide (also called multislide) stamping is a specialized process that uses four independent sliding tools that approach the workpiece from four directions — north, south, east, and west — plus a vertical press component. This multi-directional forming capability allows us to make complex bends and shapes that would be extremely difficult or impossible with a conventional single-axis press.
How it works differently from progressive stamping: In progressive stamping, the press moves in one direction — straight down. All bending and forming must be accomplished with that single vertical motion (using cams and lifters inside the die). In fourslide stamping, we have four independent slides that can each approach from a different angle, making bends in multiple planes within a single cycle. The part is first blanked from strip, then the four slides close in sequence to form it.
Technical details:
- Material thickness range: 0.1mm to 2.5mm
- Maximum part size: approximately 75mm × 75mm (varies by complexity)
- Capable of forming bends in multiple planes within a single machine cycle
- Can produce parts with 10+ bends that would require an extremely complex (and expensive) progressive die
- Tooling is typically simpler and less expensive than progressive dies for equivalent part complexity
When we recommend fourslide stamping:
- Parts with complex geometry and multiple bends in different directions
- Flat springs, contact springs, and wire forms
- Medium volumes (5,000 to 200,000 parts) where progressive die cost isn't justified
- When part geometry makes progressive die design impractical
Why fourslide is one of Worthy's core specialties: Fourslide stamping requires specialized equipment and experienced setup technicians — not every stamping supplier has this capability. At Worthy, we've invested heavily in fourslide machines specifically because so many of the complex small parts our customers need (springs, clips, contacts, retainers) are best produced this way. Our fourslide operators have 10+ years of experience with these machines, and our engineers design fourslide tooling in-house.
Real example: An electronics customer in Japan needed a complex phosphor bronze contact spring with 8 bends in 3 different planes. Their previous supplier had quoted a 20-station progressive die at 35,000.Weproposedafourslideapproach—thetoolingcostwas35,000. We proposed a fourslide approach — the tooling cost was 35,000.Weproposedafourslideapproach—thetoolingcostwas9,000, and the per-part price was actually lower because the fourslide cycle was faster for this particular geometry. The customer saved over 70% on tooling and received parts 2 weeks sooner because fourslide tooling is faster to manufacture.
Typical tooling investment: 3,000–3,000 – 3,000–15,000. Significantly lower than progressive dies for complex parts, and faster to build (typically 2-3 weeks vs. 4-6 weeks for progressive dies).
Deep Draw Stamping
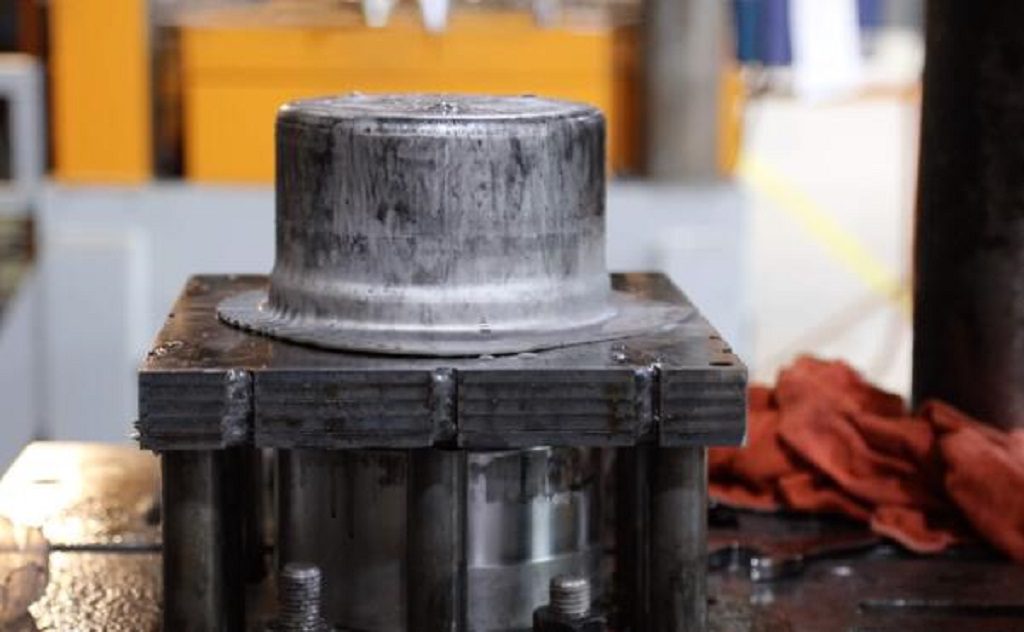
Deep draw stamping pulls a flat metal blank into a die cavity using a punch, creating a seamless hollow shape where the depth equals or exceeds the diameter (or smallest cross-sectional dimension). This is the process used to make cups, cans, shells, housings, enclosures, and any component that needs to be a one-piece hollow form.
How it works: A circular (or shaped) blank is clamped at its edges by a blank holder. A punch then pushes the center of the blank down into a die cavity, pulling the edge material inward and forming a cup shape. The metal doesn't stretch in the traditional sense — it flows and redraws from the flange area into the wall.
Technical details:
- Maximum draw ratio (blank diameter ÷ part diameter) in a single operation: approximately 2.0 for most materials
- For deeper parts, we use multiple draw stages (redrawing), reducing the diameter and increasing depth incrementally
- Wall thickness changes during drawing: the bottom remains close to original thickness, walls thin slightly (typically 5-15%), and the top edge (flange) thickens
- We use our hydraulic presses (up to 500 tons) for deep draw because they provide constant force throughout the stroke — essential for preventing tearing
- Materials best suited for deep drawing: low-carbon steel, aluminum, copper, brass (ductile materials)
When we recommend deep draw stamping:
- Parts that need to be seamless (no welding, no joints)
- Cylindrical, rectangular, or irregular hollow shapes
- Applications where structural integrity is critical (pressure vessels, enclosures)
- When a welded assembly would be weaker, more expensive, or aesthetically unacceptable
Real example: A medical device company needed a stainless steel sensor housing — a cylindrical cup 25mm diameter × 40mm deep with a wall thickness of 0.5mm. The draw ratio of 2.5 exceeded single-stage limits, so we designed a two-stage progressive deep draw die. First draw created a 32mm cup, second draw reduced it to the final 25mm diameter and 40mm depth. The finished parts are seamless, burr-free, and pass pressure-leak testing at 100%.
Typical tooling investment: 10,000–10,000 – 10,000–40,000 depending on part size, depth, number of draw stages, and whether additional operations (piercing, trimming, flanging) are included in the die.
Transfer Stamping
Transfer stamping is used for parts that are too large to stay connected to a carrier strip, or that require forming operations (like deep drawing) that can't be performed while the part remains attached to strip material. Instead of advancing through a progressive die on a strip, the individual part is physically transferred from one die station to the next by a mechanical transfer mechanism (usually servo-driven gripper bars).
How it differs from progressive stamping:
- In progressive stamping, the part stays attached to the strip throughout all operations
- In transfer stamping, the blank is separated from the strip first, then moved between independent die stations
This gives us more freedom for complex 3D forming operations because the part isn't constrained by an attached carrier strip.
Technical details:
- Can handle larger parts than progressive stamping (parts up to 500mm+ in one dimension)
- Ideal for parts requiring multiple deep draw stages
- Allows operations that require access to all sides of the part (which isn't possible while attached to a strip)
- Press speeds are slower than progressive (typically 20-60 strokes per minute) but still much faster than manual handling
When we recommend transfer stamping:
- Parts too large for progressive strip feeding
- Multi-stage deep drawn parts where the blank must be free from the strip
- Complex 3D geometries that require operations from multiple angles
- Medium to high volumes (5,000+ parts) of larger components
Real example: An automotive customer needed a large steel bracket (180mm × 120mm) with a drawn section in the center plus multiple pierced holes and bent flanges around the perimeter. The part was too large for our progressive die strip width capacity, and the drawn feature required the blank to be free. We designed a 5-station transfer die: blank at station 1, first draw at station 2, redraw at station 3, pierce and trim at station 4, final flange bending at station 5. Output: 30 parts per minute.
Typical tooling investment: 15,000–15,000 – 15,000–60,000 depending on number of stations and part complexity. Higher than progressive for equivalent part size because each station requires its own complete die set, plus the transfer mechanism must be configured.
How to Choose the Right Process: Decision Framework
To help you make an initial determination, here's a decision framework based on the questions I ask every new customer:
| Question | If Your Answer Is... | Recommended Process |
| How large is your part? | Small (under 75mm) | Progressive or Fourslide |
| How large is your part? | Medium to large (75mm+) | Progressive or Transfer |
| Does your part have bends in multiple planes? | Yes, 3+ planes | Fourslide |
| Does your part need to be a hollow, seamless shape? | Yes | Deep Draw |
| Is your annual volume above 50,000? | Yes | Progressive (usually lowest cost) |
| Is your annual volume 5,000–50,000? | Yes | Fourslide or Progressive (depending on complexity) |
| Is your part too big to fit on a strip? | Yes | Transfer |
Process Comparison Summary
| Process | Best For | Volume Sweet Spot | Tooling Cost Range | Tooling Lead Time | Per-Part Cost at Volume |
| Progressive | High-volume small/medium parts with multiple features | 50,000+ /year | 8,000–8,000 – 8,000–50,000 | 4–6 weeks | Lowest |
| Fourslide | Complex small parts with multi-plane bends | 5,000 – 200,000 /year | 3,000–3,000 – 3,000–15,000 | 2–3 weeks | Low |
| Deep Draw | Seamless hollow parts (cups, shells, housings) | 5,000+ /year | 10,000–10,000 – 10,000–40,000 | 4–6 weeks | Moderate |
| Transfer | Large parts or multi-stage deep draws | 5,000+ /year | 15,000–15,000 – 15,000–60,000 | 5–8 weeks | Moderate |
Whether you're sourcing your first stamped part or switching from a supplier who hasn't met your expectations, here's what I recommend:
- Gather your requirements — drawing (2D or 3D), material preference, annual volume estimate, tolerance requirements, surface finish needs
- Send them to a qualified manufacturer for DFM review and quotation
- Evaluate the response — not just the price, but the speed, depth of feedback, and quality of communication
- Start with a prototype or sample order to verify quality before committing to large volumes
Conclusion
At Worthy, we've built our entire business around making this process easy and low-risk for buyers. No minimum order quantity. Free DFM review on every project. 100% inspection as standard practice. Direct access to our engineering team. And a 15-year track record of serving customers in North America, Europe, Japan, Singapore, Australia, and the Middle East across 12+ industries.
If you have a stamping project — whether it's a rough concept that needs engineering input or a production-ready drawing that needs a reliable manufacturer — send it to us. Our engineers will review your design, provide DFM feedback, and deliver a detailed quotation within 24 hours.
Contact us:
- 📧 Email: [email protected]
- 🌐 Website: www.worthyhardware.com
- 📋 What to include: Drawing file (PDF, DWG, STEP, or IGES), material, quantity, tolerance requirements, surface finish, and target delivery date
We look forward to earning your business — one precision part at a time.
— Sandra Gao, Worthy Hardware